
Installationsanleitung
-
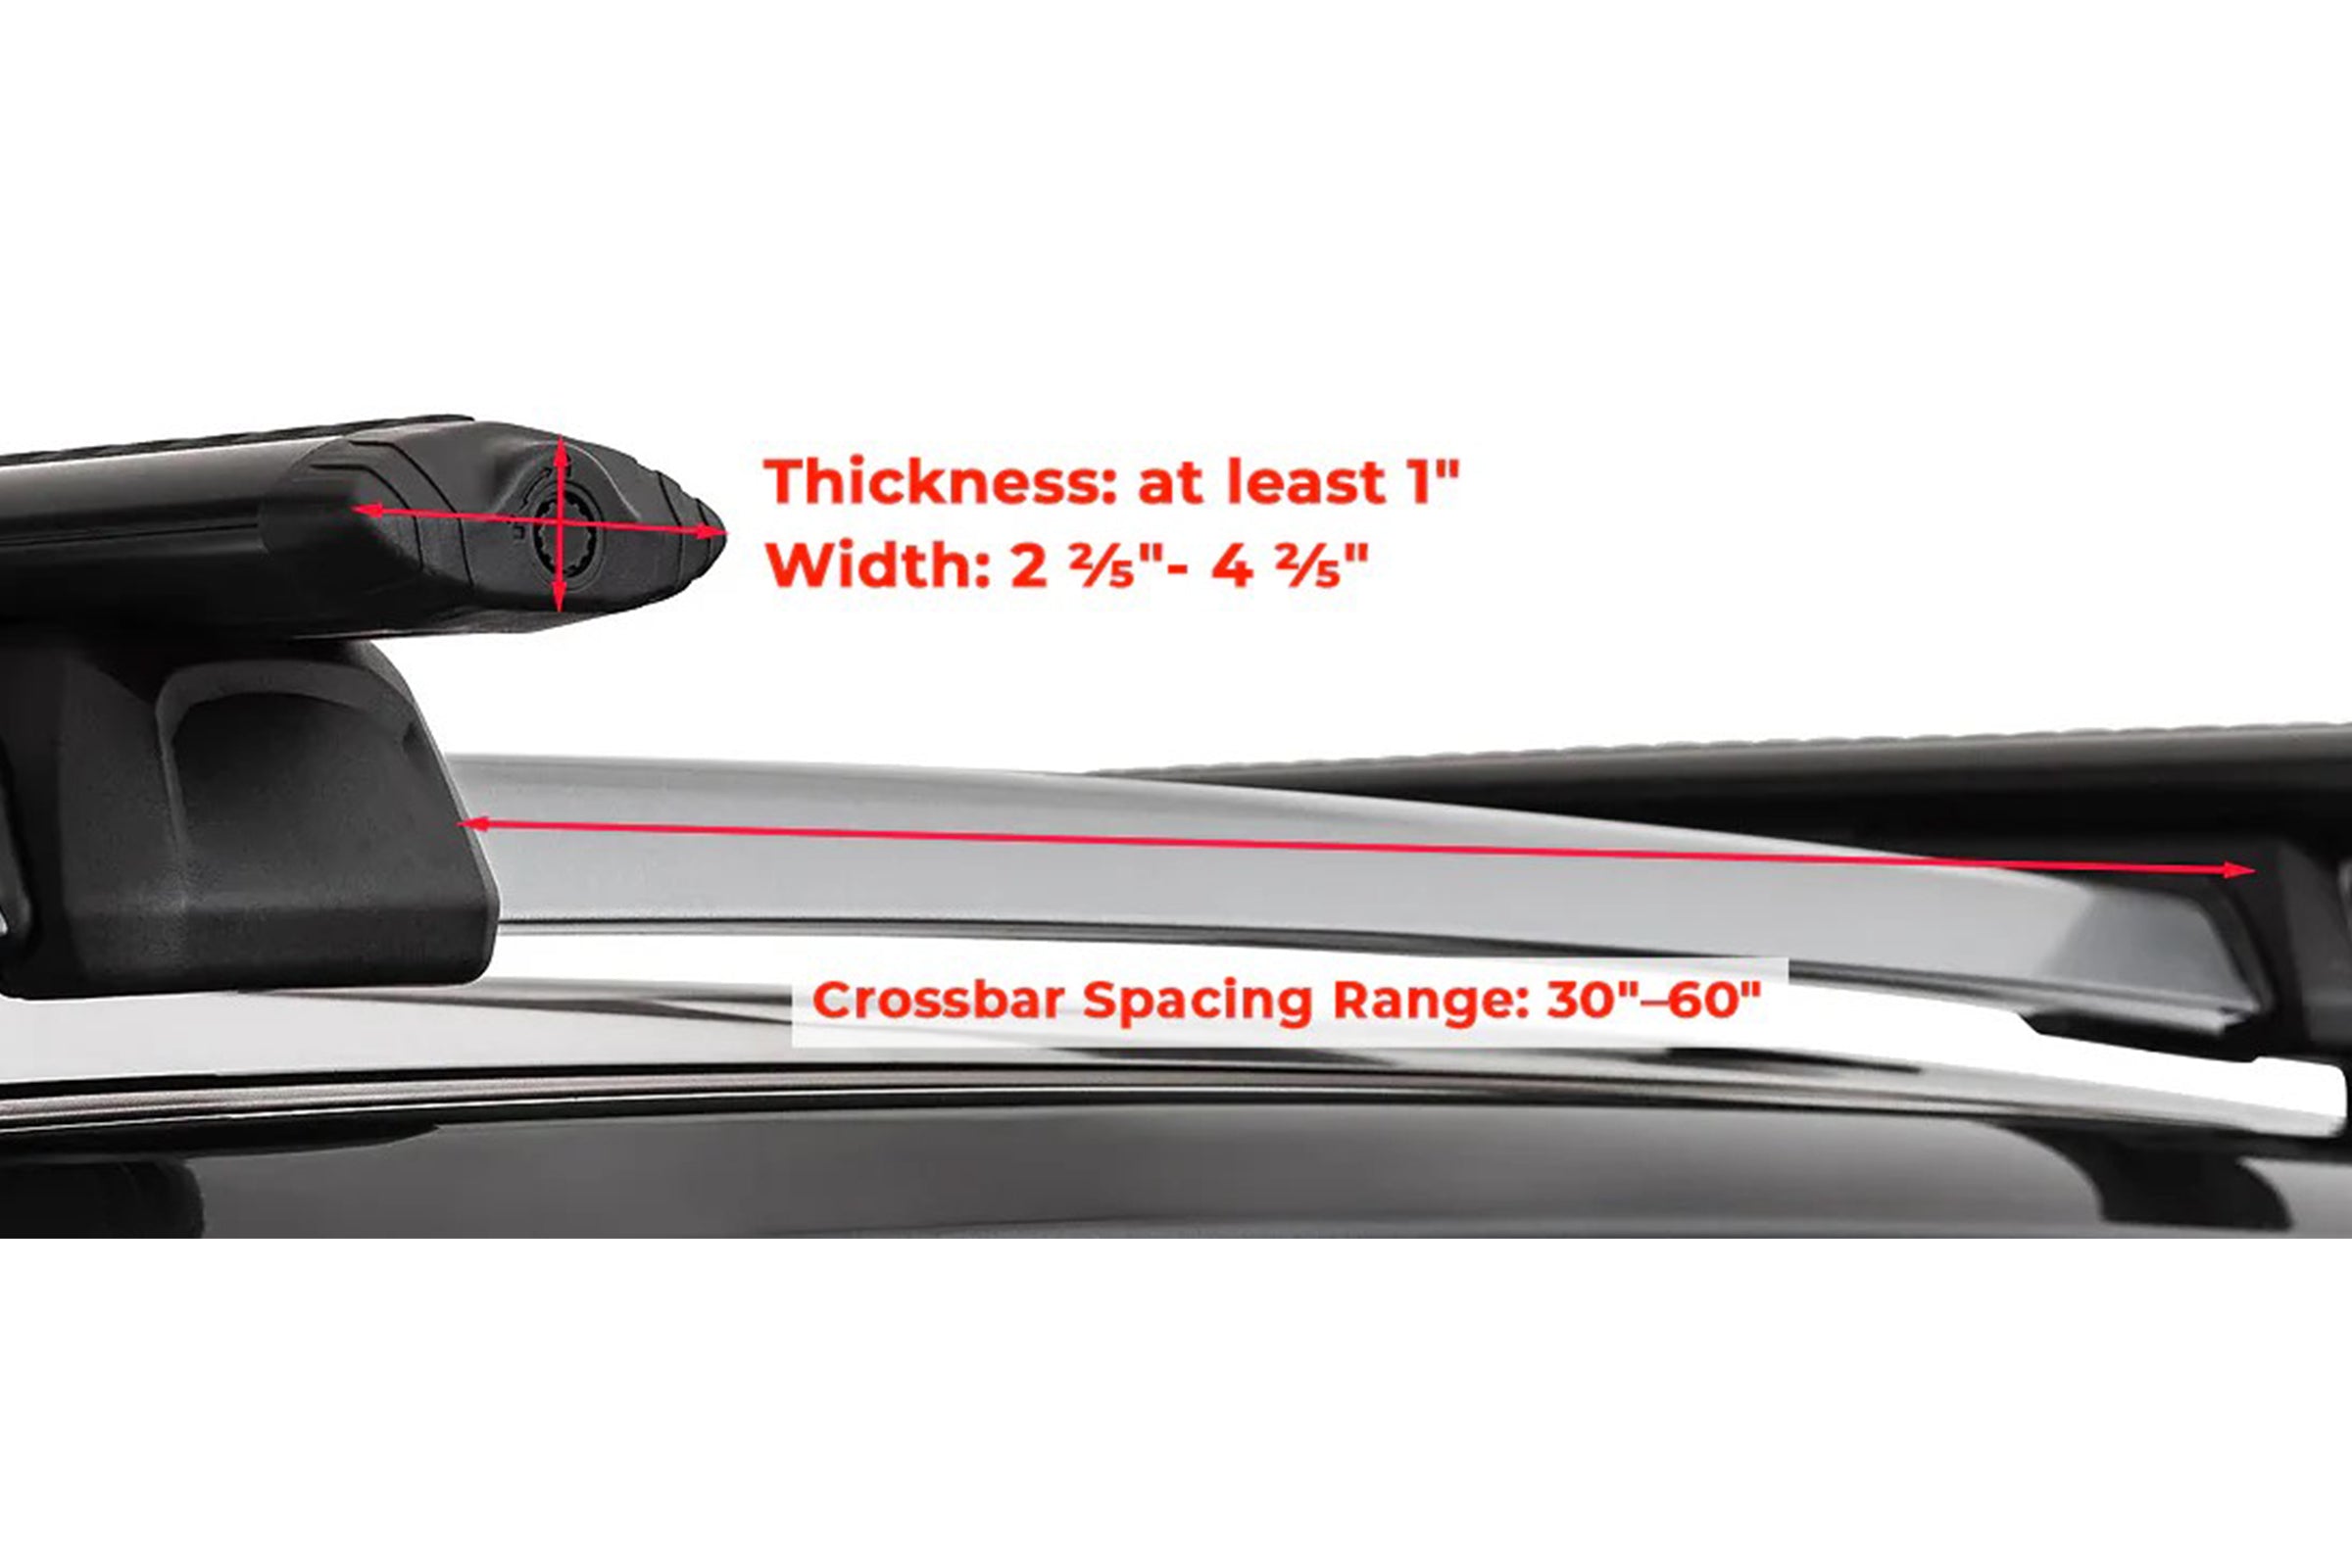
① So wählen Sie Croosbar
• Dicke der Querbalken : Jeder Querbalken muss mindestens 1 Zoll dick sein.
• Querbalkenbreite: Jeder Querbalken muss zwischen 2 ²⁄₅" Zoll und 4 ²⁄₅" Zoll breit sein.
• Abstand der Querstangen : Der Abstand zwischen den Querstangen muss zwischen 30 und 60 Zoll betragen.
• Dynamische Gewichtskapazität : Ein aerodynamisches Dachträgersystem mit einer dynamischen Tragfähigkeit von mehr als 80 kg (176 lb) kann sicher installiert werden. -
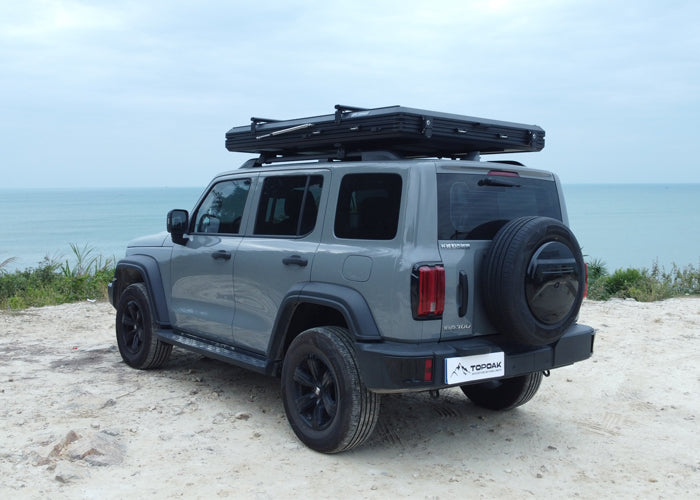
② Heben Sie das Zelt an
• Heben Sie das Zelt auf Ihre Querstangen (Sie benötigen dazu einen oder zwei Freunde), wobei der Zeltgriff zum Heck Ihres Fahrzeugs und die Scharniere zur Vorderseite Ihres Fahrzeugs zeigen.
-
3. Das Zelt richtig positionieren
Stellen Sie sicher, dass das Zelt ungefähr dort positioniert ist, wo Sie es haben möchten. Wenn es gut aussieht, ist es das auch! Bei SUVs und Schräghecklimousinen öffnen Sie Ihren Wagen und schieben Sie das Zelt so weit nach hinten, dass es den offenen Kofferraum knapp berührt. So stellen Sie sicher, dass das Zelt die Funktion des Kofferraums nicht beeinträchtigt.
-
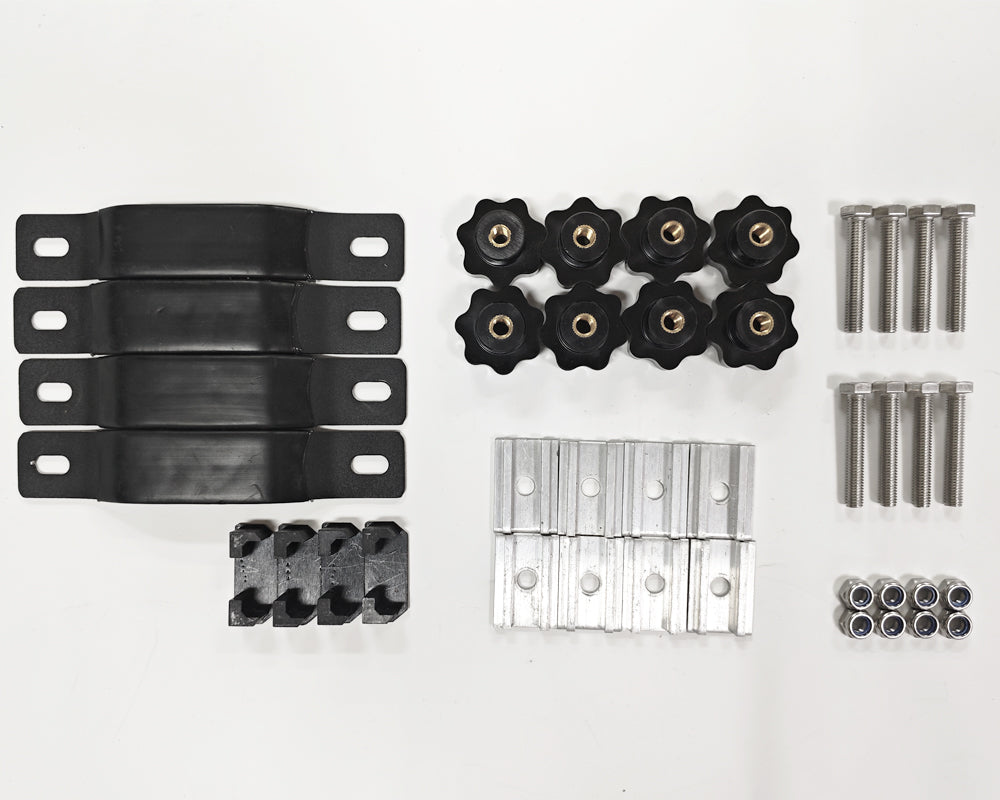
④ Bereiten Sie die Montagesätze vor
Legen Sie alle Teile aus dem Einbausatz bereit.
-
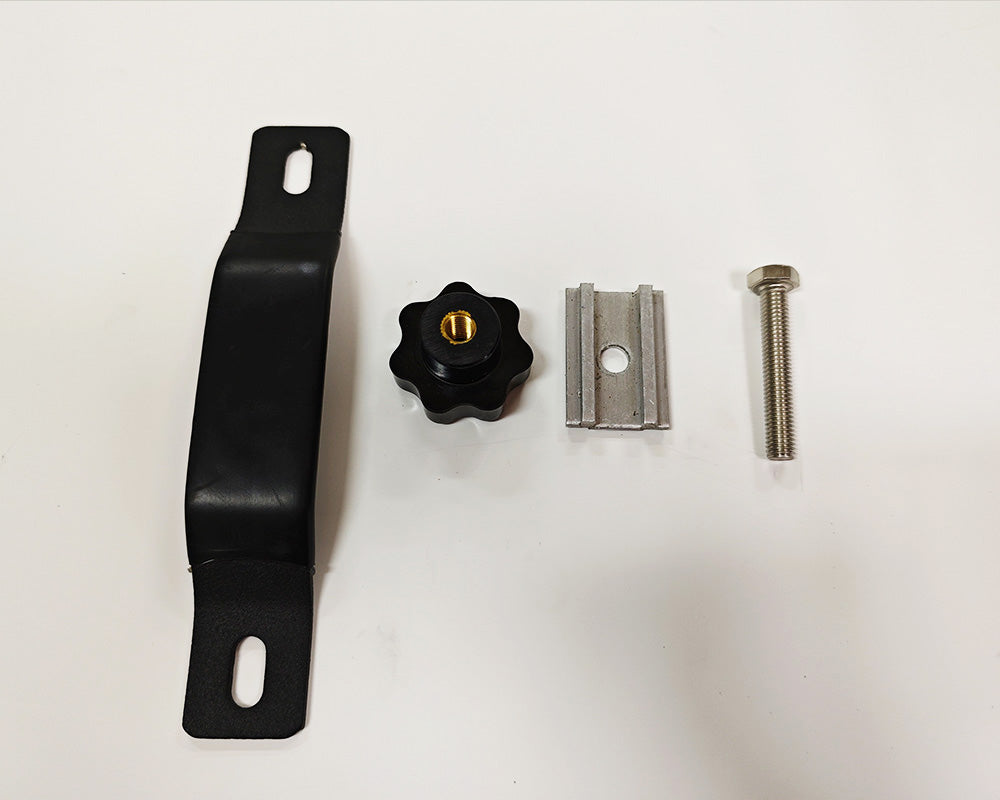
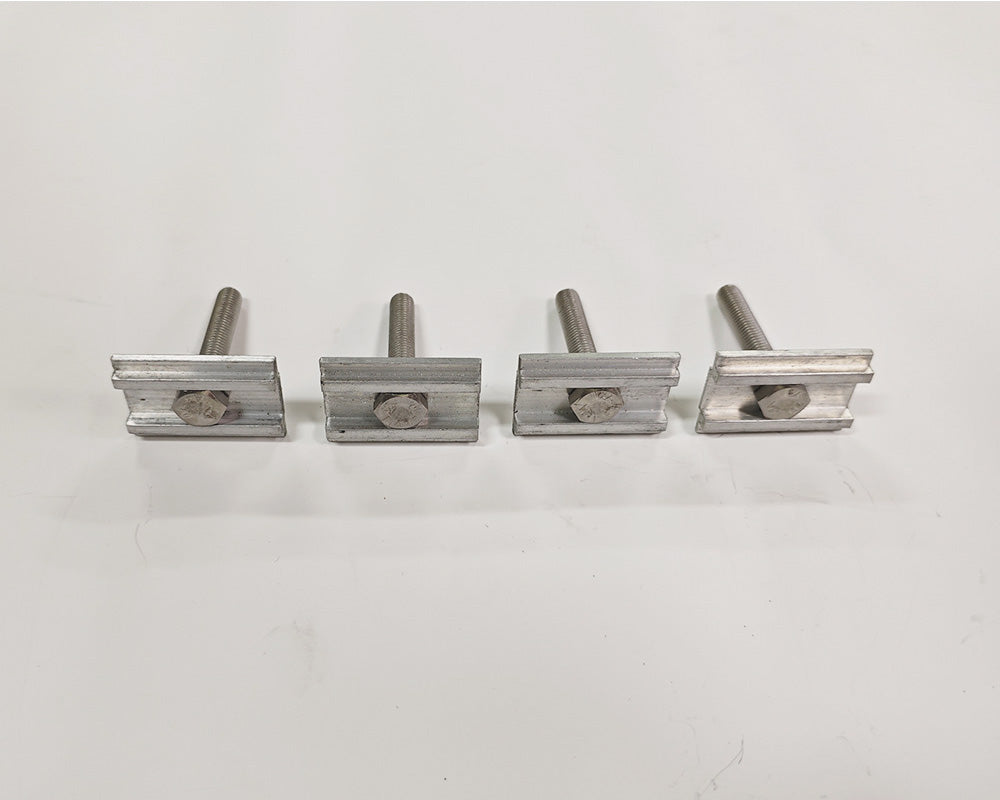
⑤ Vorbereiten der Montagekomponenten
Nehmen Sie eine U-Halterung , eine schwarze Schnellspannmutter , eine Montageplatte und eine M8-Schraube heraus und bereiten Sie sich auf die Montage vor.
-
⑥ M8-Schrauben einsetzen
Setzen Sie eine M8-Schraube in eine Montageplatte ein (Schienen zeigen nach oben).
-
⑦ Verbinden Sie die Komponenten miteinander
Montieren Sie die Teile aus Schritt ⑥, indem Sie sie zusammenstecken. Achten Sie darauf, dass die U-Halterung mit der konkaven Seite nach oben positioniert ist. Befestigen Sie anschließend knapp zur Hälfte eine schwarze Schnellspannmutter . Wiederholen Sie diesen Vorgang dreimal.
-
⑧ Schieben Sie vier Montagesätze in die Schiene
Bitten Sie einen Freund, das Zelt leicht anzuheben und vier Befestigungssätze auf die Innenseite des Dachträgers zu schieben. Wiederholen Sie dies für jede Ecke des Zelts.
-
⑨ M8-Schrauben wieder einsetzen
Montieren Sie auch die anderen vier Sätze M8-Schrauben und Montageplatten (mit den Schienen nach oben) .
-
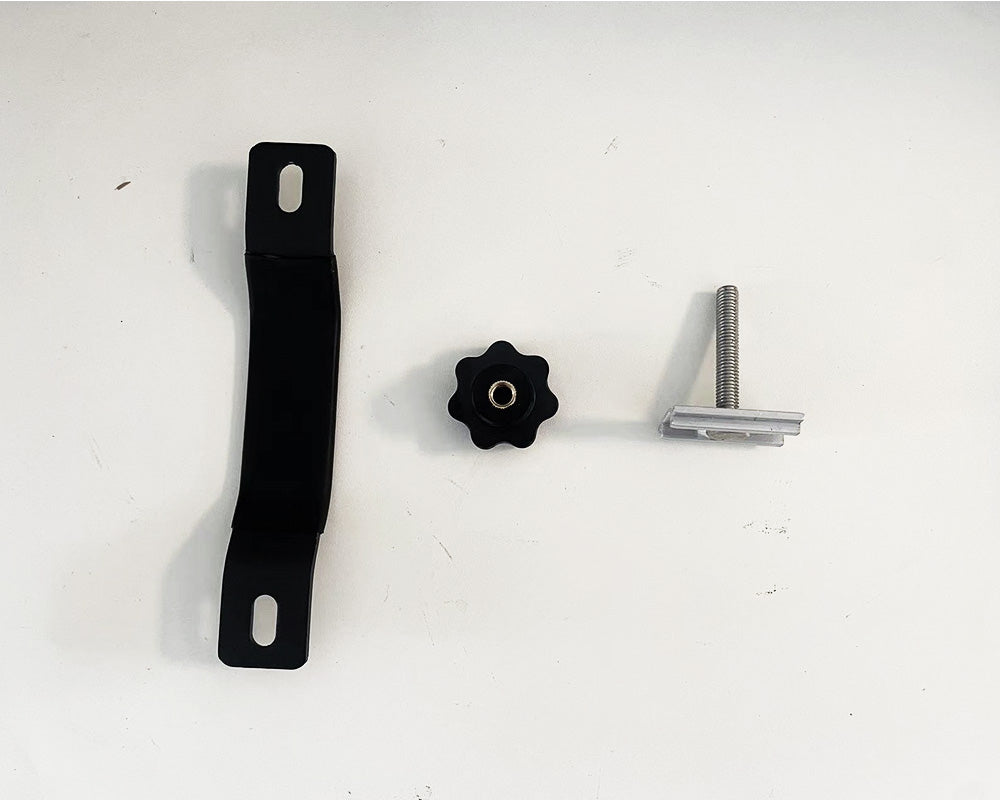
⑩ Bereiten Sie das Schieben der Teile vor
Bereiten Sie vier montierte M8-Schraubensätze und vier schwarze Schnellspannmuttern vor.
-
⑪ Schieben Sie vier M8-Schraubensätze
Schieben Sie die montierten M8-Schrauben aus Schritt ⑨ in die Schiene.
-
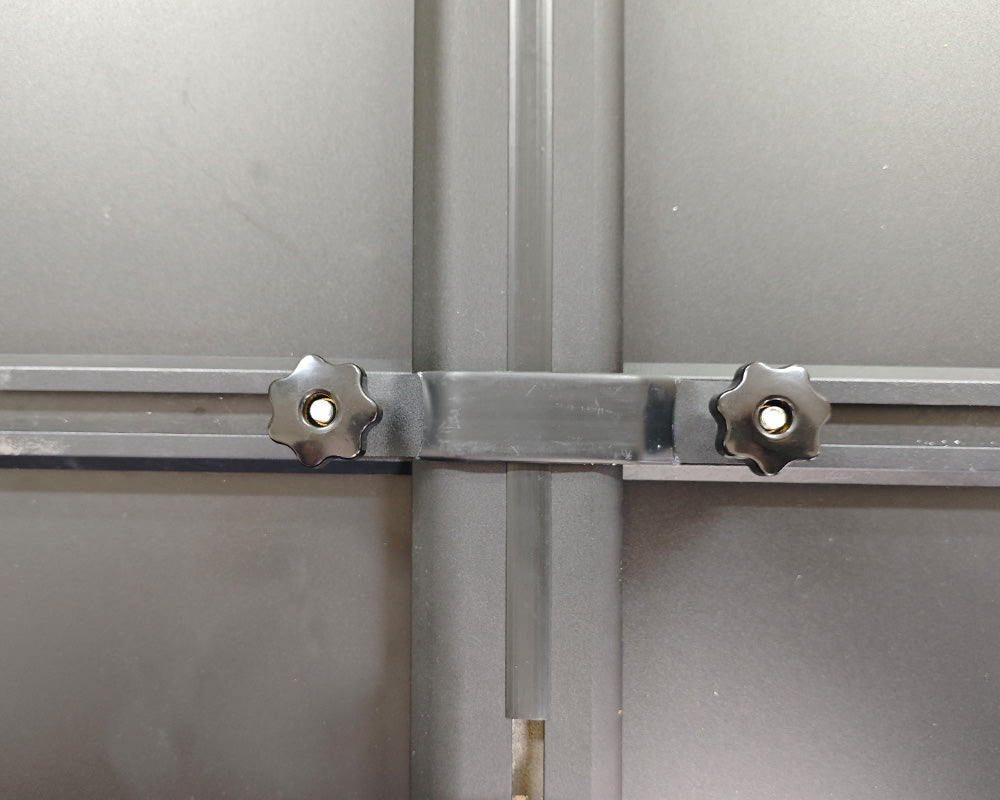
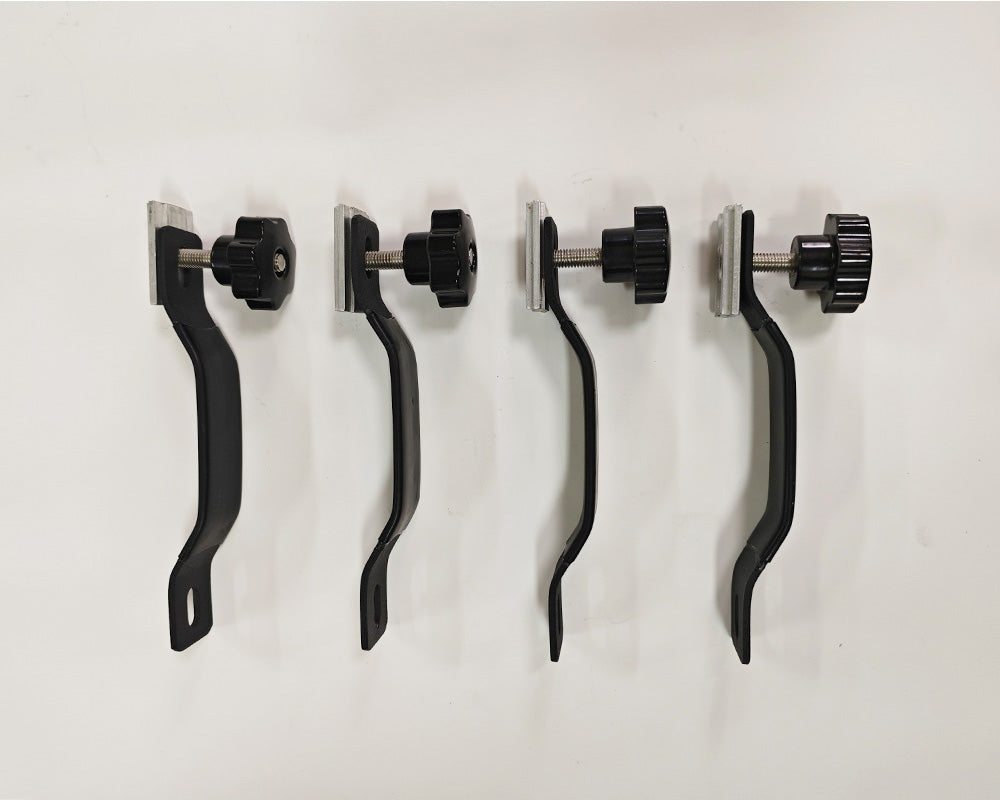
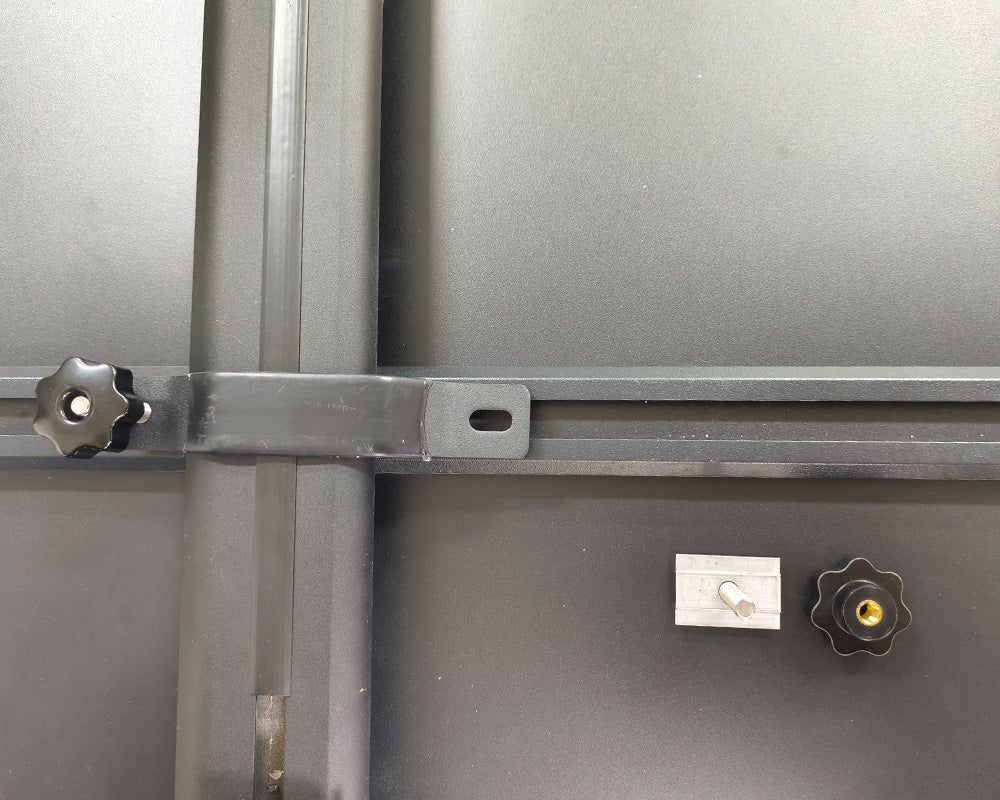
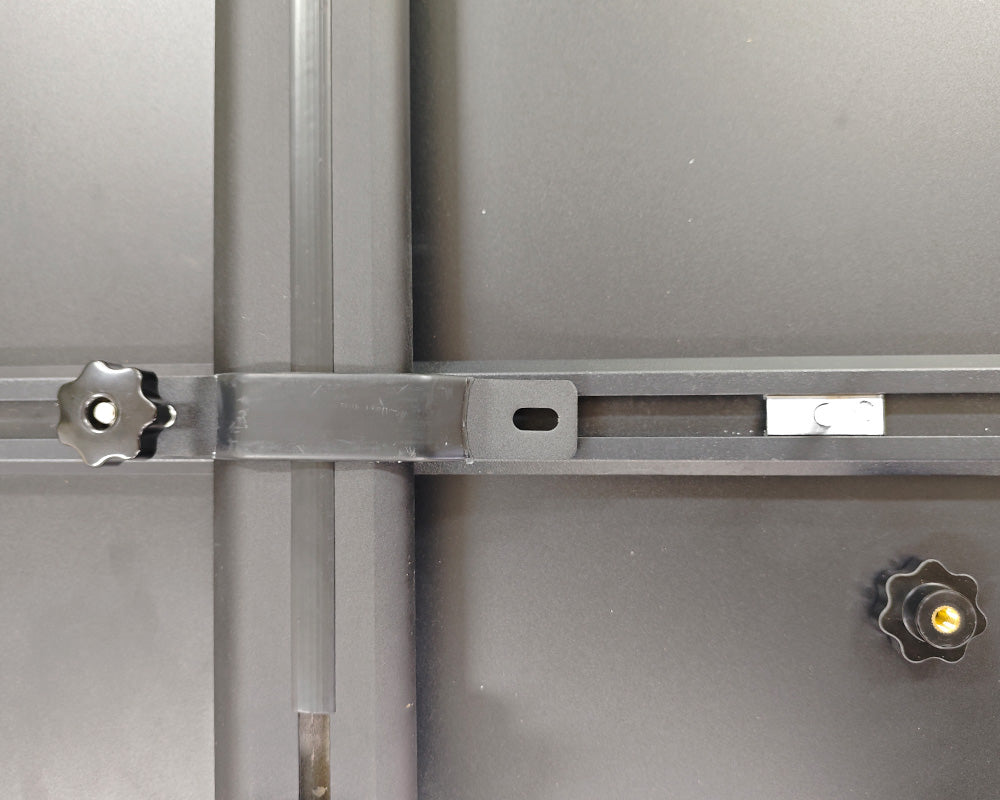
⑫ Ziehen Sie eine schwarze Schnellspannmutter handfest an
• Ziehen Sie eine schwarze Schnellspannmutter handfest auf die M8-Schraube. Wiederholen Sie dies für alle vier Ecken.
• Ziehen Sie die Muttern gleichmäßig und fest an und achten Sie darauf, dass Sie Ihre Zelte genau dort auf dem Dach Ihres Fahrzeugs ausrichten, wo Sie sie haben möchten, bevor Sie die Muttern endgültig festziehen.
-
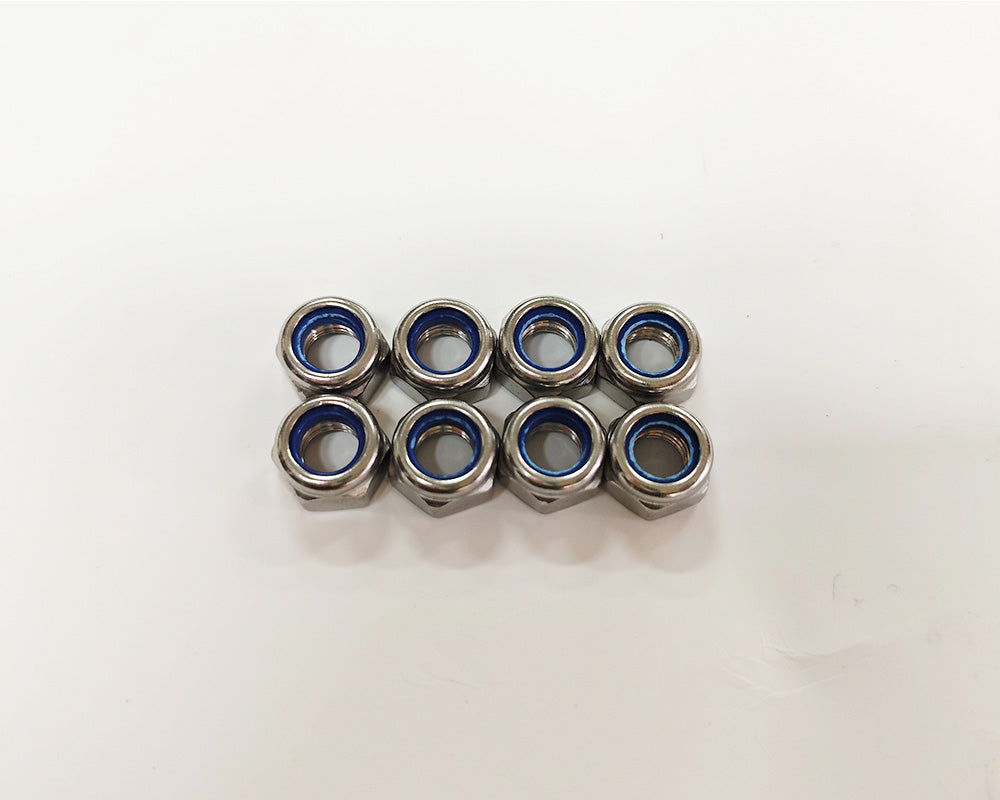
⑬ Anti-Rutsch-Muttern vorbereiten
Bereiten Sie acht Anti-Rutsch-Muttern vor.
-
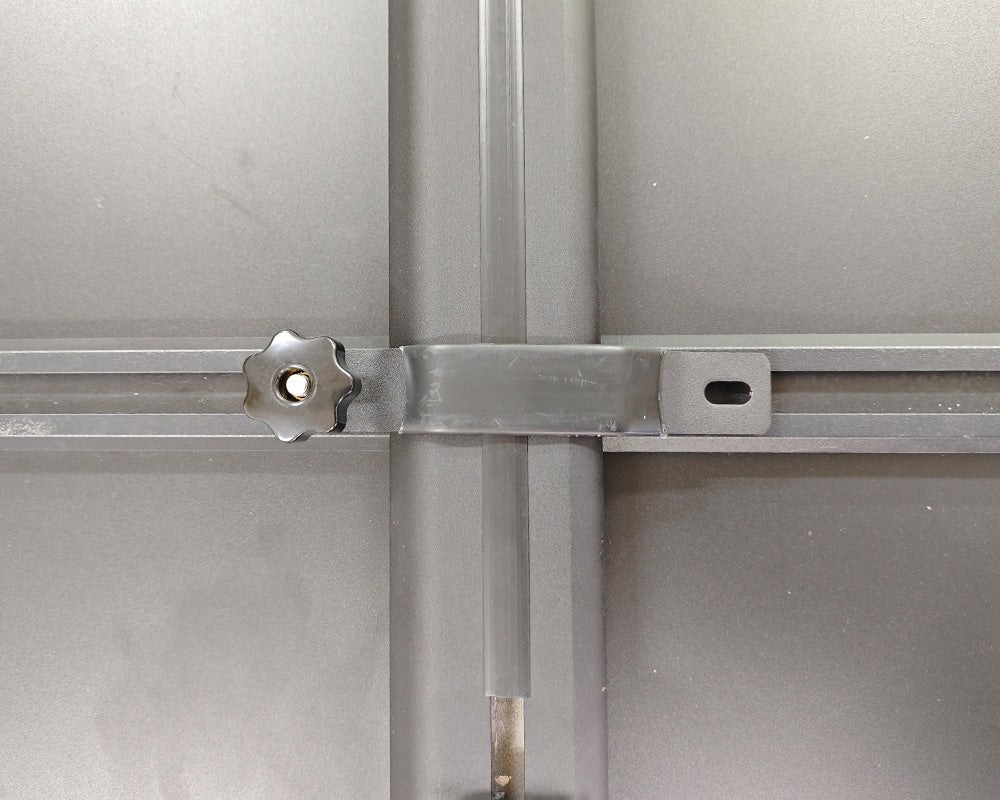
⑭ Sichere Antirutschmuttern
Befestigen Sie sowohl die schwarzen Schnellspannmuttern als auch die Antirutschmuttern (mit dem blauen Gummiring) an den Schraubenenden vollständig.
Die schwarzen Schnellspannmuttern sind optional – sollte der Platz für beides nicht ausreichen, müssen zur Sicherheit trotzdem die Antirutschmuttern montiert werden . -
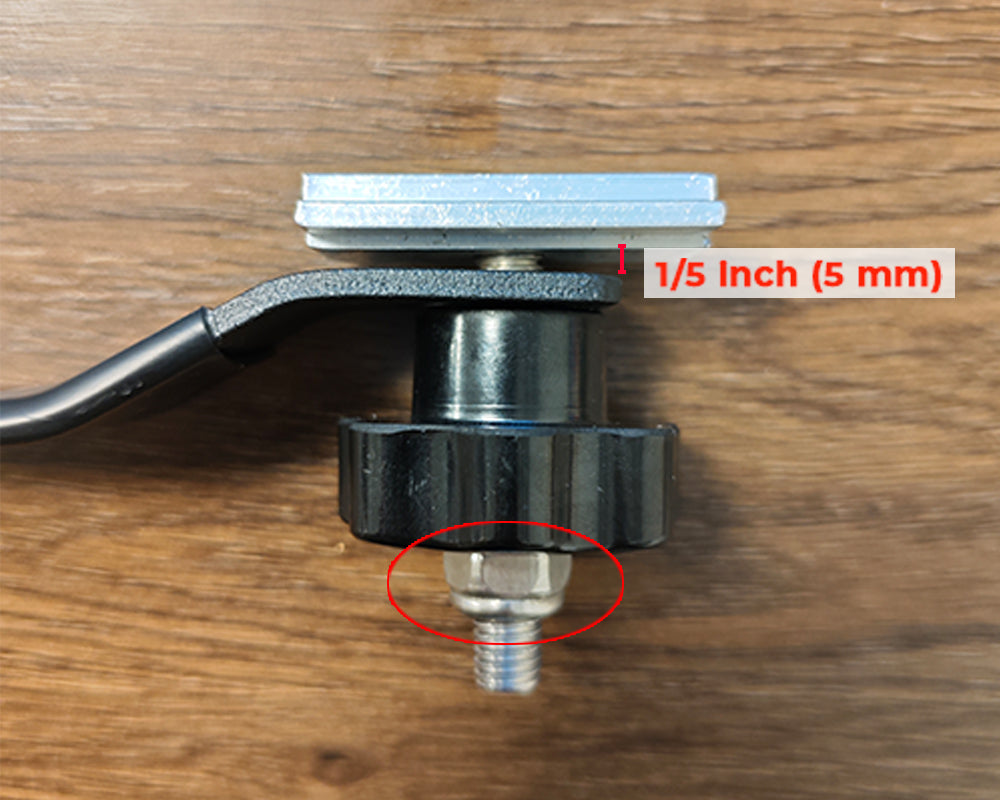
⑮ Anweisungen zum Anziehen der Mutter
• Wenn nach dem Festziehen aller Muttern der Abstand zwischen der U-Halterung und dem T-Schlitz weniger als 1/5 Zoll (5 mm) beträgt, wenden Sie sich bitte an uns, um Hilfe zu erhalten.
• Überprüfen Sie regelmäßig alle Muttern und ziehen Sie sie vor jeder Fahrt nach, insbesondere wenn das Zelt über einen längeren Zeitraum montiert war.
-

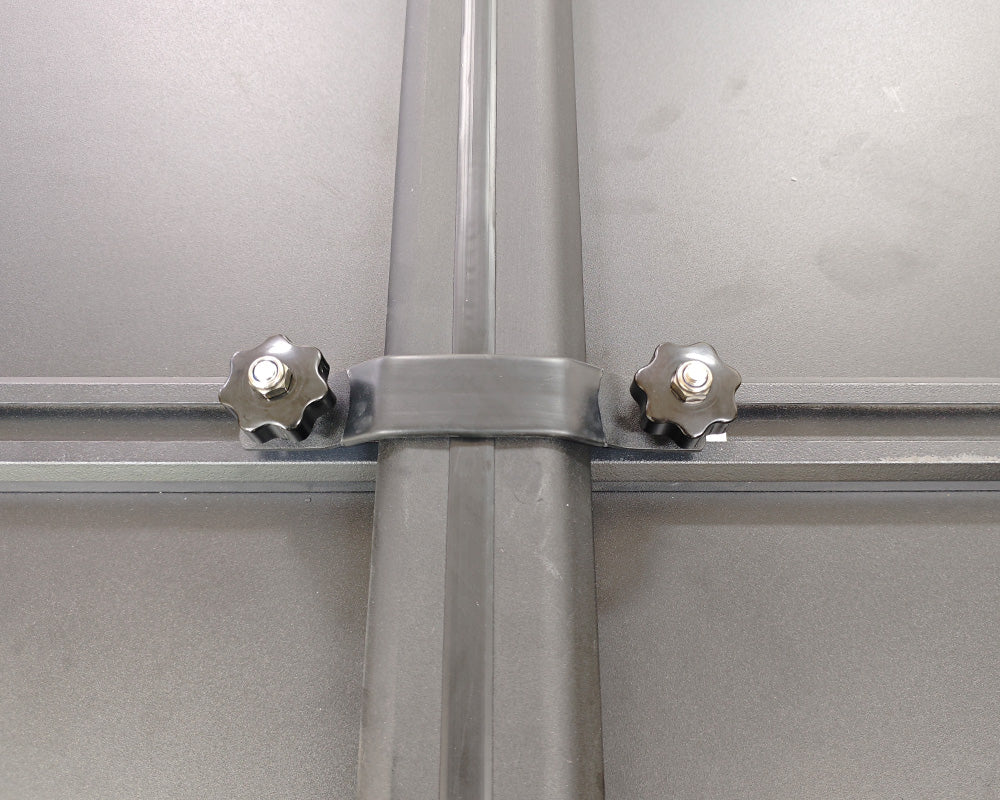
⑯ Bereiten Sie vier Endkappen vor
Bereiten Sie vier Endkappen des Dachgepäckträgers vor.
-
⑰ Installieren Sie vier Endkappen
Montieren Sie Abdeckkappen an den Enden des Dachträgers. Diese Kappen halten nicht nur Staub und Sand fern, sondern reduzieren auch Windgeräusche während der Fahrt.


